Well, it’s been a while since I posted on the blog. What better way that with another DIY post!
I’ve been talking about buying a new computer for a while. Ever since my Asus X53 laptop started slowing down on me earlier last year (I bought it back in 2012), and the battery becoming useless, I decided I need something reliable that would serve me well when I needed to do any graphic or web design work (and wouldn’t take 5 minutes to boot up Photoshop). Maybe finally I could have a system that will be able to handle any of the video editing I’ve been meaning to do for my cooking business. Something that’s a bit “future-proof”.
So after a lot of research I thought, “Hey, I’ve taught an introduction to computer engineering class before. Why not try and build my own computer with the specs that I need?”
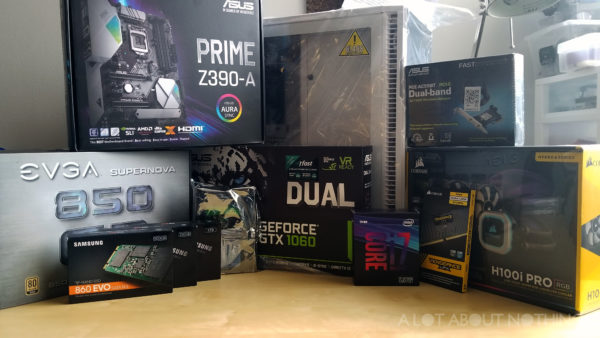
All the components I purchased for my first PC build.
Enter PC Partpicker. I cannot say enough how much of a godsend that website has been when it came. To picking all the components I needed for my new PC build, and making sure that each of those parts were compatible. The forum and review sections helped a lot. After I started a build with the site, and doing my own research on the parts I needed for a computer that would be best for my creative needs, I had a list.
I’m sure your thinking, why not buy a pre-assembled computer at Best Buy? Well, I wanted control over exactly what was inside of my PC. And besides, the iMac Pro I initially wanted would’ve cost me an arm and a leg.
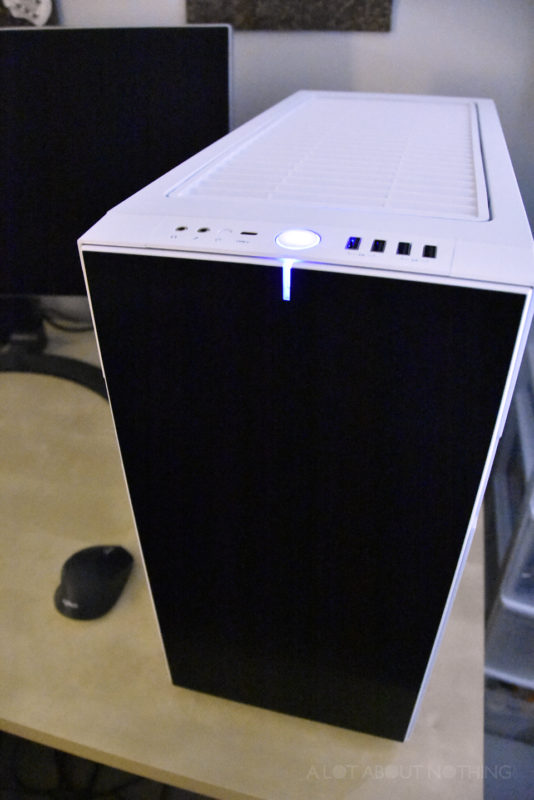
In order not to back out of this endeavor I bought the case first (Fractal Define R6) online, so it sad shipped to me before Christmas. No turning back now!
I knew it was going to be expensive, but thankfully Boxing Day sales saved me about 30% of the price of the majority of the components. I had the toughest time choosing the processor, because it was a toss-up between the i7 8700k (6 cores, 12 threads) and the i7 9700k (8 cores, 8 threads), but I opted for the later since video editing was only a portion of what needed this computer for, some Adobe programs are still single threaded, and better for overclocking if I choose to do that in the future.
I ordered all the parts mostly from Canada Computers and Newegg. Once everything was shipped and picked up from the store, I was ready to build.
YouTube was a valuable resource for me, as viewed several videos that were helpful for beginners as they started to build their first PC.
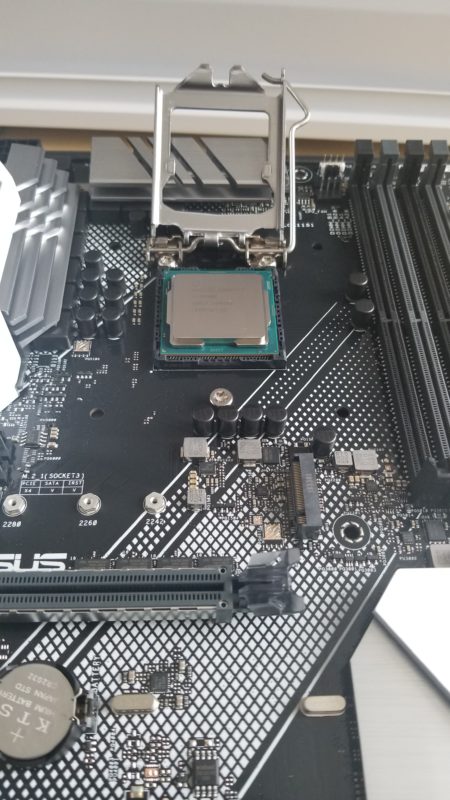
After unboxing all the parts, I skimmed through all the manuals just to make sure I had all the parts and was starting things right. I dropped in the Intel CPU onto the motherboard (Asus Prime Z390). A bit nerve-wracking because in every DIY building tutorial they said never to touch the pins. I also made sure I grounded myself to avoid shorting out the sensitive equipment with static electricity… so no wool socks for me, and I touched the metal case frequently to be extra safe.
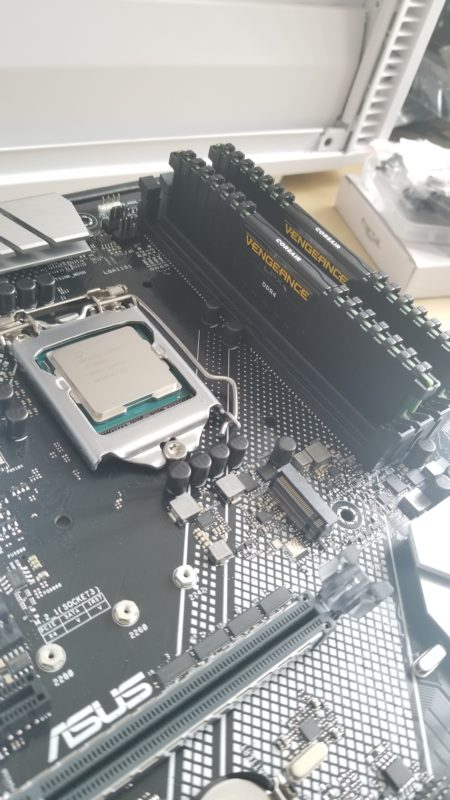
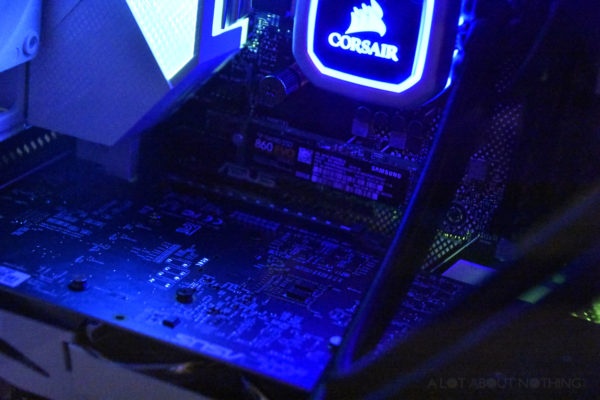
I also installed two sticks of ram (32GB total). I originally wanted to get the white Corsair Vengeance memory, but the black version was in sale for $80 less.
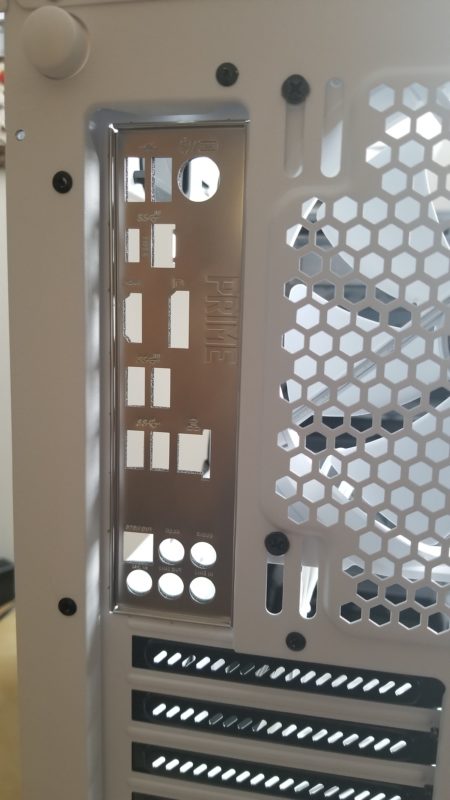
Getting the I/O shield to fit into the chassis was a bit of a pain, but I got it slotted in properly after a few minutes. Then I screwed in the bracket that would support the liquid cooler on the back of the motherboard, and put it aside as I worked on other components.
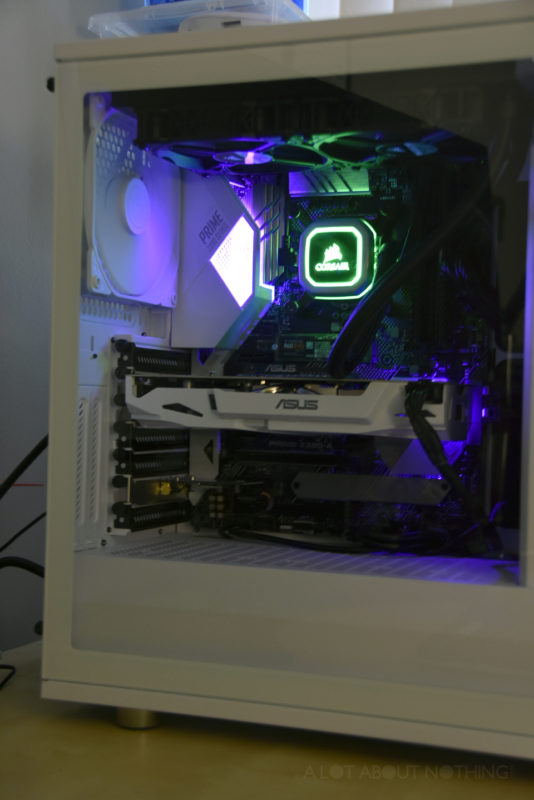
Focussing on the radiator for the AIO (Corsair H100i PRO), I dismantled the top of my Fractal R6 chassis in order to reveal a mesh plate and a metal gate that would hold it.
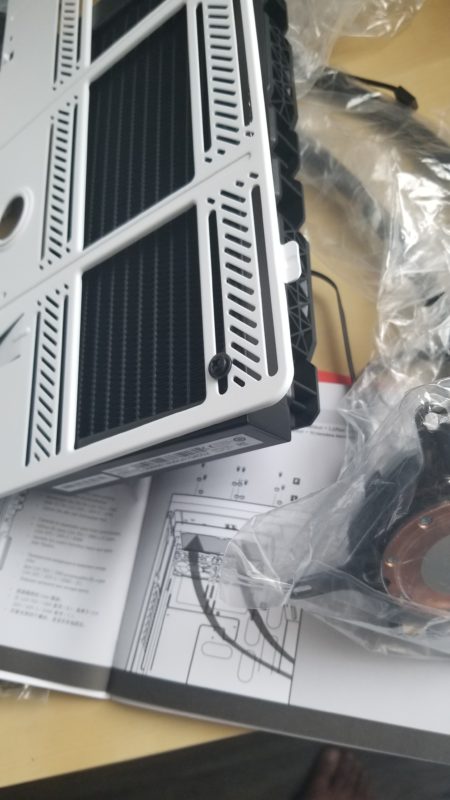
Trying to get the radiator on seemed simple enough. I had to figure out which direction to orient the fans to (as I wanted an intake). Didn’t notice until later that there were a couple of small arrows on the fan’s casing that tells you that.
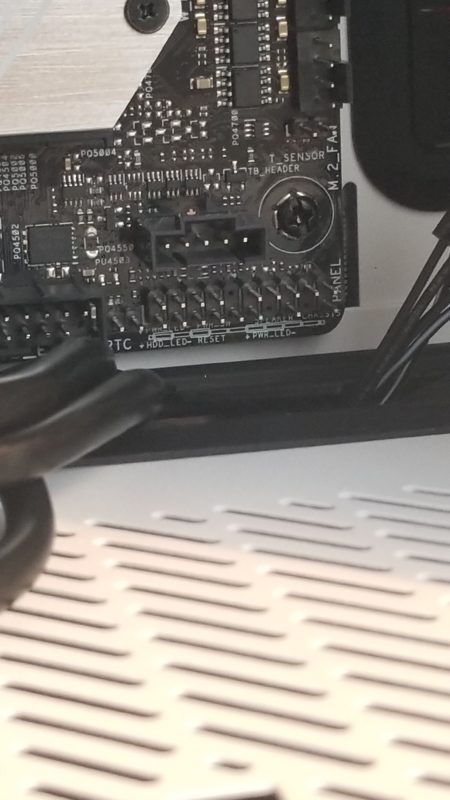
After installing my M.2 SSD under the heatsink, I finally secured the motherboard to the case with the 8 screws provided. Then I started to connect some of the front panel headers to the appropriate pins.
The AIO pump was easy enough to install, except for realizing at the last second that I had the wrong screws in the the bracket, so I couldn’t fit the pump over the CPU. I had to put the protective plastic backing back on the pump so I didn’t damage the thermal paste, took out the bracket from the back of the motherboard (thank goodness I could see the back from the other side of the case), and replace it with the correct screws (LGA 1151).

Getting the mesh vent back on the top of my Fractal R6 case was a pain. For some reason the holes weren’t lining up correctly. I figured that if it was fitting in correct when I took. It out, there’s no reason it shouldn’t be fitting now. I looked at the manual and wondered why my mesh vent was in a reverse orientation than the picture. Was this a manufacturing defect? No. It’s just that I screwed in the radiator on the opposite site… Lol. Whoops! Also one of the screws were interfering with the radiator fitting in properly under the vent, so after I removed one it slid in fine (I just hope the radiator and fans don’t drop on my graphics card in a few months!).
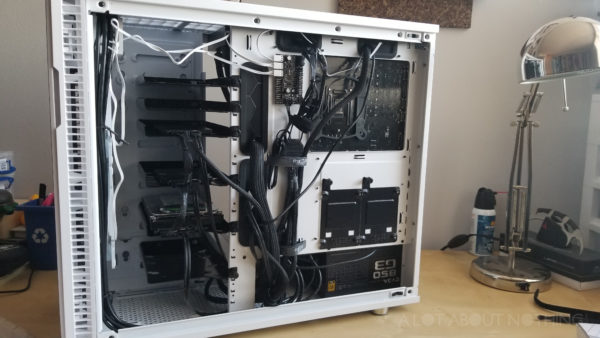
Cabling: What a nightmare at first! I think I’ll need glasses after this after trying to read all that miniscule print on the motherboard. And those single pins for the front panel buttons were ridiculous… Why can’t they have this as a single block? Thank goodness gir needle nosed pliers. After searching for a bit and consulting the manual, I was able to track down all the correct pins and match them to the cables (the multiple USB headers were a bit confusing).
I had already put the power supply in the bottom of the chassis, which had all the correct cables connected. I drew them through the nearest slots on the chassis where they’d come close to the correct pins on the motherboard. Getting all those cables managed neatly was a challenge too, but it’s a good thing the Fractal R6 has some great cable management features.
The cable issue that gave me the most stress was connecting my AIO and case fans to the motherboard. My chassis came with a PWM hub, so initially I plugged my three case fans into that. Connected that to a SATA cable for power and I thought I was done. Nope! There were extra cables! Some of them I had no idea what connections they were for, especially that “Molex” 4 pin connector that I had plugged into a peripheral cord, and then figured out I didn’t need it after all!
I got so confused because the Fractal manual said to connect the hub to CPU_FAN, but that’s ether my AIO needed to be connected! After much Googling, and finding out a lot of people had the same question, I learned I can point the hub towards CPU_OPT and keep the AIO header in CPU_FAN.
Initially, I wanted to purchase a motherboard with built-in Wi-Fi (because there’s no network cable in the room I have my computer in), but the Asus Prime 390-A was on sale and so was the wireless adaptor.
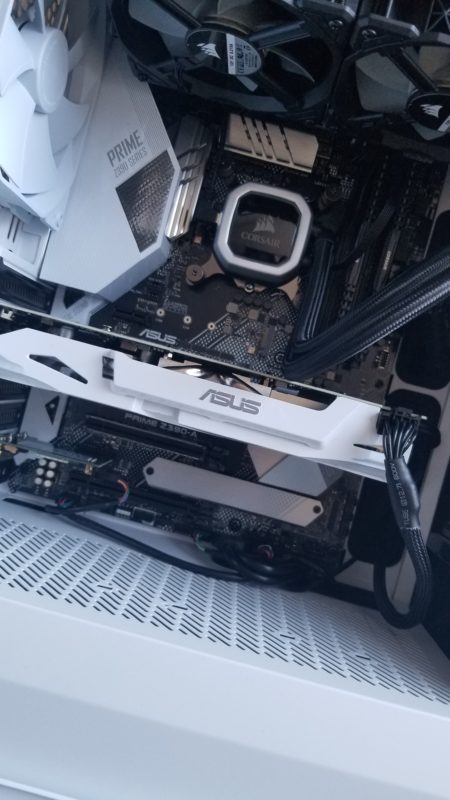
Last but not least, the graphic card was the last to go in. The Asus GeForce GTX 1060 is gorgeous! I wish I had the extra cash to purchase the adaptor from Fractal and vertically mount it in order to show off it’s full glory (but I was also worried about the fan exhaust being so close to the glass panel).
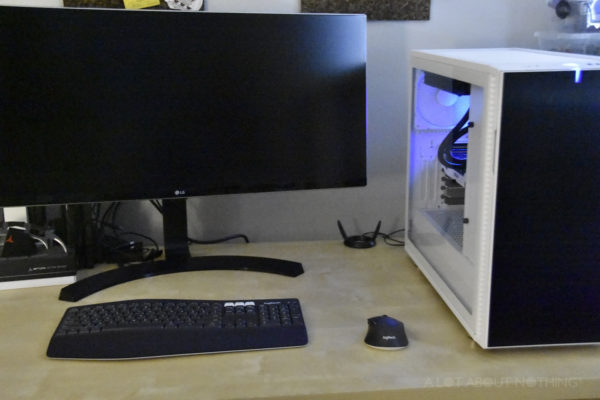
After adding some hook and loop straps to keep things neat and tidy, everything seemed complete. Time to boot up!
Holding my breath I plugged in the power cord, connected the monitor, keyboard and mouse and hoped for the best. I pressed the power button on the front of the chassis and it turned on! Fans were moving, lights were glowing… The only thing is that the monitor had no picture.
It’s allliiiivvvee!
I removed the display port cable I had and tried it again. Nothing. I hoped there was nothing wrong with the graphics card. I tried plugging the monitor directly into the motherboards I/O. Still nothing. Then I took a closer look at the motherboard manual: “Turn on the devices in the following order: Monitor, External Storage Devices, System Power.” Whoops! I forgot to plug my monitor in the first time I booted up, and did so after the computer was already on. No wonder! I tried it again and it worked!
But now there was an error message:” an m.2 sata device has been detected in the m.2_2 socket… Fatal error.”
Noooo! So close! So I looked back in my motherboard’s manual and noticed where the second m.2 slot is located on the motherboard. Back to the drawing board!
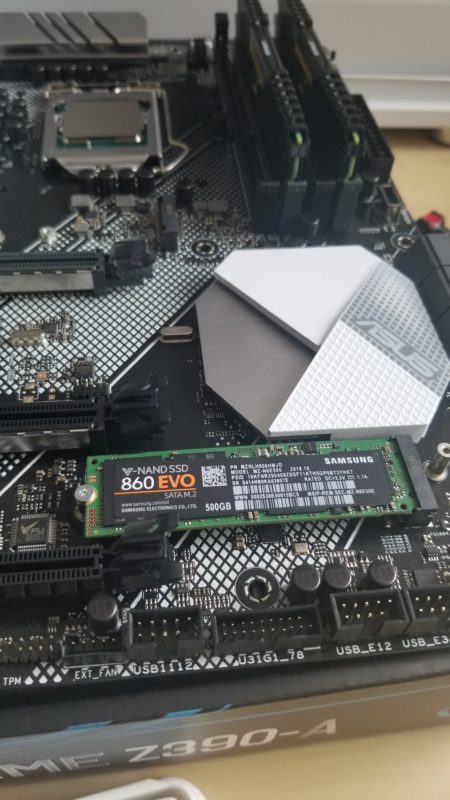
Whoops… Installed the m.2 card in the wrong slot at first!
After I meticulously removed the m.2 card from the incorrect slot, I placed it where it was supposed to go and hoped for the best. Turning the computer back on and waited. The LEDs lit up, but then I hear a faint click and it looked like the computer shut off! Then it went on and off again. I was about to cry wondering if I shorted out the motherboard after dropping that screw in it when I was moving the m.2. But then it went on again. I looked at the screen and I see the BIOS booting up!
Yay… It worked! I change a few of the settings in the BIOS (focussing on the ram limitations, and other recommended settings), then I installed Windows 10, formatted the extra three drives and was done! ðŸ˜
Even though this process took me about 6 hours total, I spent about half the time reviewing YouTube videos, going over the various manuals, and fixing the small mistakes with set-up. If I were to do think again, I could brobably get it down in less than half the time. I’m definitely proud of myself. I’ve learned a lot from this process, and more confident about my knowledge about the inner workings of computers.
I am now a full-fledged nerd. 🤓

Here’s the total part list if you’re wondering. Everything came up to about $2500 (my poor credit card), but almost everything was at a discounted price.
- CPU: Intel – Core i7-9700K 3.6 GHz 8-Core Processor
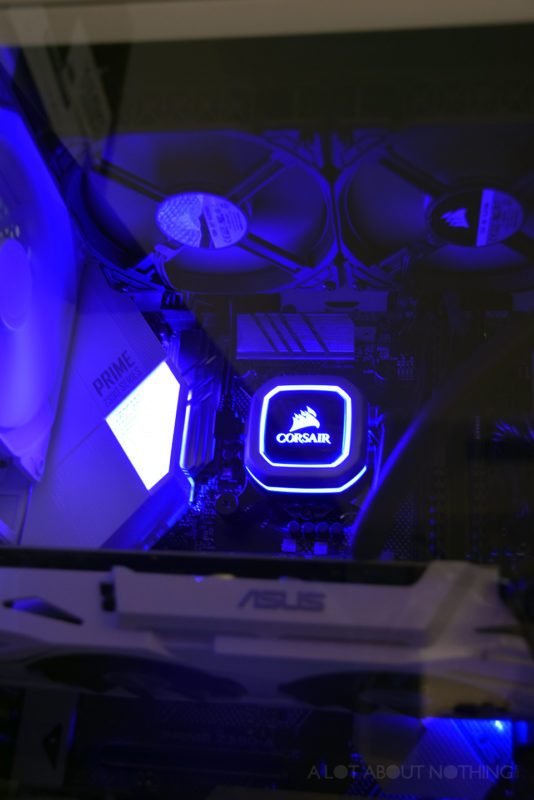
- CPU Cooler: Corsair – H100i PRO 75 CFM Liquid CPU Cooler
- Motherboard: Asus – PRIME Z390-A ATX LGA1151 Motherboard
- Memory: Corsair – Vengeance LPX 32 GB (2 x 16 GB) DDR4-3000 Memory
- Storage: Samsung – 860 Evo 250 GB 2.5″ Solid State Drive (for my media cache and scratch disk)Â
- Storage: Samsung – 860 Evo 500 GB M.2-2280 Solid State Drive (for my operating mystem, apps and programs)
- Storage: Samsung – 860 Evo 1 TB 2.5″ Solid State Drive (my working drive)Â
- Storage: Seagate – FireCuda 2 TB 3.5″ 7200RPM Hybrid Internal Hard Drive (my archive, media storage and video exports)
- Video Card: Asus – GeForce GTX 1060 6GB 6 GB Dual Video Card
- Case: Fractal Design – Design Define R6 USB-C – TG ATX Mid Tower Case
- Power Supply: EVGA – SuperNOVA G3 850 W 80+ Gold Certified Fully-Modular ATX Power Supply
- Wireless Network Adapter: Asus – PCE-AC55BT PCI-Express x1 802.11a/b/g/n/ac Wi-Fi Adapter


on August 11, 2016