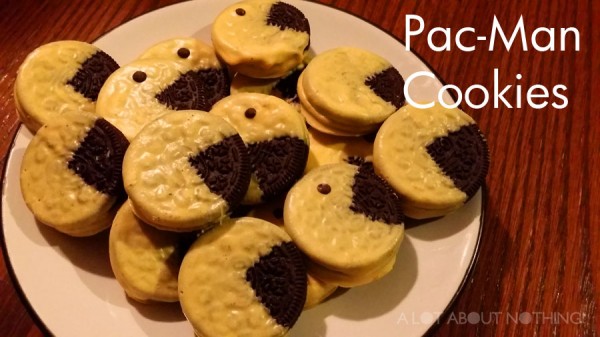
I had a huge 80s-themed birthday last month (stay tuned for the updated post), and went to town on all the treats and decorations. One of them was Pac-Man cookies. Super simple to make, and they were a hit.
Yield: About 60 cookies
Ingredients:
2 packages of Oreo cookies (or any dark-coloured cookie)
10g black or chocolate-flavoured candy melts or moulding wafers (for the eyes — optional)
Coconut Oil
Method:
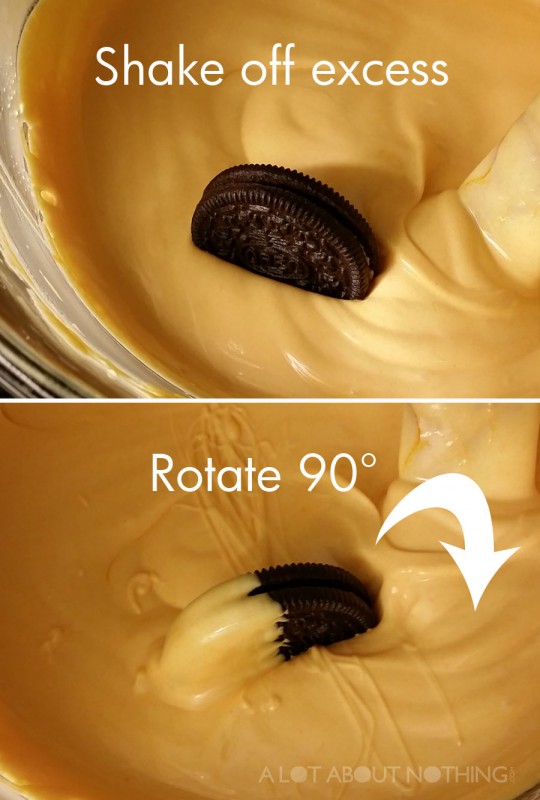
Using a double boiler (I used a glass bowl over a saucepan filled with some water), melt the wafers over simmering heat, stirring constantly until they have melted. Remove from heat.
Take an Oreo cookie and dip it halfway into the mixture, letting the excess drip off carefully back into the bowl. Rotate the cookie 90° and dip it into the mixture again. This should create the “open mouth” Pac-Man shape.
Place cookie on a lined baking sheet covered with parchment paper.
Repeat with remaining cookies until all are dipped. Water should not come in contact with the wafers, as it will ruin the smooth consistency. If the mixture is too thick you can add a bit of melted coconut oil to thin it out.Â
For the eyes, melt the chocolate-flavoured wafers in a small bowl in the microwave for 1 minute on low power (or until melted). Fill a sandwich bag with the mixture, cut a small piece off the corner to form a piping bag. Gently squeeze a bit of the dark mixture to dot eyes for the Pac-Man cookies.
Cookies harden fairly quickly. After 20-minutes or so they can be stacked in a reusable container, ready to be eaten!
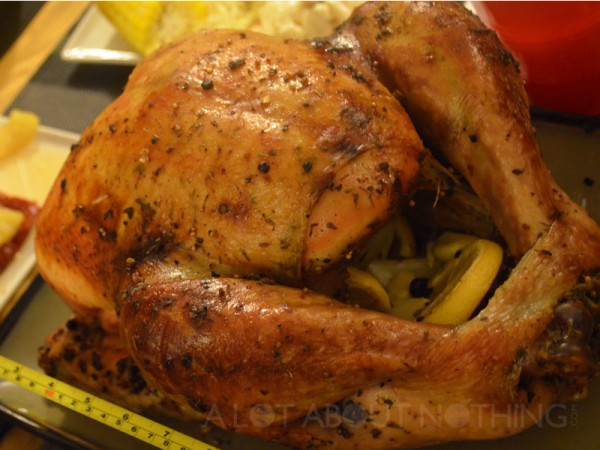
This year, the responsibility of hosting the annual family Thanksgiving dinner landed on my shoulders… two days before the big day (don’t you just love family?). I picked up a frozen Butterball turkey on the Saturday, and crossed my fingers that it would thaw out within the next 36 hours so that I would have time to prep it before putting it in the oven.
Despite my love of cooking, this marked the very first time that I prepared a turkey from start to finish on my own. I had to defrost it as quickly as possible. Ideally I would’ve left it in the fridge for a couple of days, but with dinner a little more than a day away I needed it to thaw out fast.
I didn’t want any chance of bacteria growing, thus giving my family food poisoning, so I knew I had to thaw it correctly. So I opted to put the big guy in a large pot of cold water, making sure that I replaced the cold water every couple of hours. Because this sucker was so big, I had to keep on rotating it in the wok I was using to thaw it out, but it worked: it was thawed out completely within 6 hours.
After removing the giblets and neck, I rinsed the turkey under cold water. Then it was on to the first flavouring step: a brine.
Turkey Brine Recipe
1 cup kosher salt
1 cup brown sugar
3 tbsp of whole black peppercorns
6 bay leaves
1 tbsp dried sage
1 tbsp dried thyme
1 tbsp dried onion flakes
2 tsp chopped garlic
3 cups water
I boiled all the ingredients together for a few minutes of minutes (until the salt and sugar dissolved), then took it off the heat to cool down. Once completely cool, I added the brine to about 4 litres of cold water. This was the “turkey bath”. I left the turkey to brine in the refrigerator overnight.
After I took the turkey out of the brine, I patted it dry. Â I purchased a turkey baster that came with a flavour injector needle at the last Kitchen Stuff Plus warehouse sale. So I mixed together the following ingredients and injected it all over my turkey (concentrating on the “meaty” areas” then let it sit for an hour in the fridge:
Turkey Injection Marinade
1/4 Â cup chicken broth
1/4 cup olive oil
2 tbsp Worcestershire sauce
1 tsp each of paprika, oregano, onion powder, garlic powder, salt and pepper
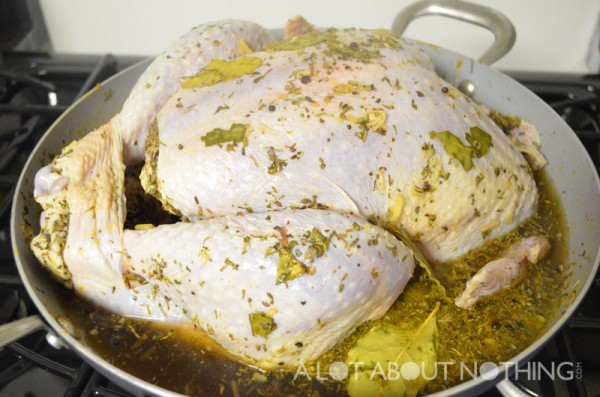
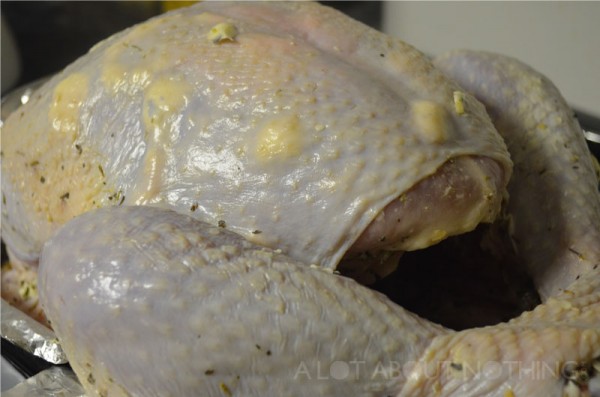
The final step for my flavourful turkey project was the rub. I used a spatula to slide inbetween the skin and the meat of the turkey, so that I could make some room to add pads of unsalted butter. I also used some melted butter, along with some olive oil, to rub on the outside skin of the turkey (so that the rub had something to adhere to).
Note: I decided not to stuff my turkey, but make the stuffing separate. It helps speed up the cooking time. I just stuffed the cavity with a couple of halved onions, a few garlic cloves, and some slices of lemon.
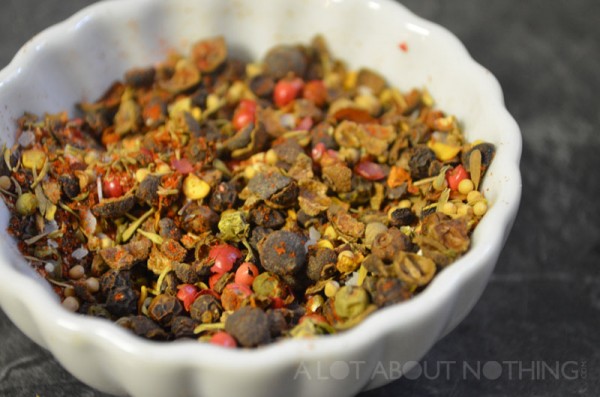
Turkey Rub Recipe
1 tbsp paprika
1 tbsp onion powder
2 tsp garlic powder
2 tbsp of 5 peppercorn blend (green, pink, white and black peppercorns, and Jamaican allspice), crushed
2 tsp mustard seeds, crushed
1 tsp red pepper flakes
1 tsp kosher salt
1 tsp ground ginger
Once the turkey was basted with the rub, I rested on a rack in the roasting pan, added some chicken broth to the bottom of the pan, and popped it in the oven, loosely covered with foil.
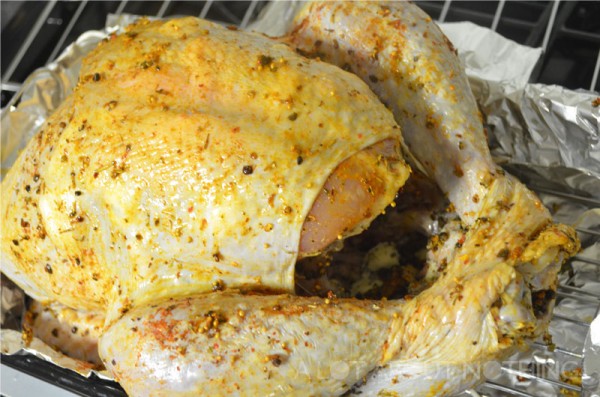
I had preheated my oven to 425F degrees. Then after cooking the turkey for 30 minutes, I lowered the heat to 350F. I basted every hour, taking the foil off during the last hour of cooking, and raising back up the heat to 425F, so that it can create a nice crust. 4.5 hours total baking time for this 12lb turkey.
It came out so flavourful, moist and delicious. If you’re trying to make a turkey (or whole chicken) and want to make sure that it doesn’t come out dry and tasteless, try using the previous three steps in order to roast a great turkey.
On Friday, I ventured off to the west end of the city towards The Toronto Congress Centre where they were hosting the third annual Canada’s Baking and Sweets Show. When I first came across the ad in the newspaper, I was excited: celebrity chefs such as Anna Olson, baker Buddy Valastro (Cake Boss), and the Cupcake Girls were going to be there. Plus, I have been personally practicing my cake-making skills and wanted to check out all the baking gadgets I could buy.
Unfortunately I didn’t get to see Anna or Buddy, because they weren’t scheduled to appear until the next couple days, but I did get to see the Cupcake Girls, Heather and Lori, and hear a bit about how they got started in the business which was inspiring.
I only paid $6 for entry (the perks of teacher discounts), and got a mini swag bag which I thought could use a little more “swag” (the Fleischmann’s Yeast Best Ever Breads cookbook and the $5 Canadian Tire coupon weren’t too shabby though).
I got some great deals on a couple cake tins and mini baking cups from the MDC Housewares booth. Ate a delicious portugese custard tart from Doce Minho Bakery, then wandered down to the Redpath booth. I picked up a free copy of an integrated curriculum resource about food energy! This will be very helpful for my teaching this year. George Brown College instructor (and professional pastry chef) Christophe Measson, put on a demo of one of his recipes: Baked Rice Pudding with Milk Jam, Apricot and Mango Compote, and Shortbread (that was a mouthful). Engaging and comedic (complete with the French accent), Christophe’s demo was easy to follow and I learned a few tricks that would help with my dessert preparation.
A few pasta cutters and a stainless-steel perogi press (I know, I know… one step at a time) were my purchases at Adamo Imports. I splurged a bit at McCalls: cake boards, boxes, bags and sticks for all the baked goods I plan on making as gifts for the holidays. Flour Confections was the last major stop and they had a wide selection of gel colours on sale, and I also picked up a couple buckets of fondant.
Personally, I thought the show was going to be a little bigger, with more vendors and giveaways. I was in and out within a couple hours. But the deals I got on some of the baking tools were pretty good. I loved the demo put on by Redpath, and seeing the fondant-covered masterpieces for the Cake Competition was awe-inspiring. I’ll probably go again next year.
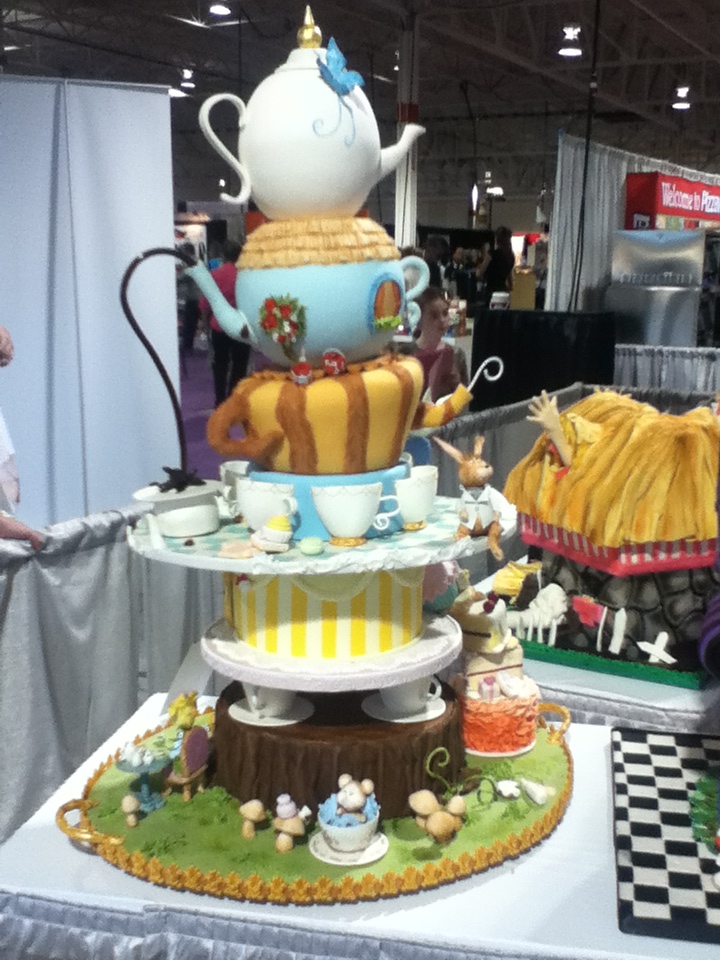
One of several of the cakes for the Alice in Wonderland Theme Competition by professional bakers.
After my first, real experience with fondant while baking and decorating my birthday cake earlier this year (which turned out pretty, darn good, if you asked me), I decided to make it my personal mission to become a better baker/decorator.
White Chocolate Mud Cake with Fondant
I had a friend celebrate her birthday over the summer, so I tested out a chocolate cake with a ganache icing, while trying to keep in mind some of the tips from the Wilton Cake Decorating Course I did back in July. It came out looking good except for the fact that public transport and the hot weather caused most of the decorations to slide off the top of the cake! At least my friend still appreciated it (and it tasted good).
Chocolate Mud Cake with a Chocolate Ganache and Buttercream Icing
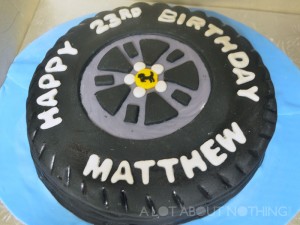
My little brother turned 23 earlier this week, so the job of bringing the birthday cake was delegated to me by my sister. I baked a chocolate buttermilk cake, and used black fondant to design it in the shape of a tire. Now originally my she wanted me to make the cake into a shape of a Ferrari, but I informed her that I wasn’t an expert as yet. My little bro happily settled for a Ferrari tire (I even painted on the horse on the logo with food colouring). Yeah, it looks like the tire is a little flat, but beggars can’t be choosers!
I’ve been there a few weeks ago and I’m from The Netherlands so i should know how it would taste and I got a apple crumble pie and it was the best I’ve ever had little expesive but okay it was delicious!
on August 11, 2016